DIY e-liquid mixing has become a popular trend in the vaping community, attracting enthusiasts who want a personalised vaping experience. This hands-on approach allows vapers to create their perfect e-liquid by combining base ingredients and flavourings to make unique blends.
The increasing interest in DIY mixing is due to several convincing reasons:
- Complete control over ingredients and quality
- Cost-effectiveness compared to pre-made e-liquids
- Customisation of flavour profiles and nicotine strengths
- Creative expression through experimenting with different combinations
At Team Top Vapes, based in our Manchester headquarters, we’ve seen this growing trend first-hand through our extensive work testing and reviewing vaping products. Our team of experienced reviewers has helped countless vapers navigate their journey from pre-made e-liquids to DIY mixing.
We bring years of hands-on experience in:
- Testing thousands of e-liquid combinations
- Reviewing the latest mixing equipment
- Providing detailed guidance on safety protocols
- Offering expert advice on flavour crafting
As your trusted source for vaping expertise, we’re here to help you decide if DIY e-liquid mixing aligns with your vaping goals. Our comprehensive guide draws from real testing experience and deep industry knowledge to give you a clear picture of what DIY mixing involves.
In addition to DIY mixing, understanding the broader aspects of vaping can enhance your overall experience. For instance, have you ever wondered how many calories are in a vape? This is an interesting aspect that many vapers overlook.
Moreover, if you’re looking for some inspiration or guidance on which products to try next, our guide to the top vape brands across the UK could be very helpful.
Also, part of keeping your vape running smoothly involves knowing how to take care of its components, such as understanding how long vape coils last and how to extend their lifespan.
Lastly, if you’re considering upgrading your device or trying something new, we recommend checking out the Elf Bar ELFX Pro Classic Pod Vape Kit 45W. This cutting-edge device is designed to elevate your vaping experience with advanced capabilities.
Understanding DIY E-Liquid Mixing
Creating your own e-liquid requires four essential components:
- Propylene Glycol (PG): A thin, clear liquid that carries flavour and creates throat hit
- Vegetable Glycerin (VG): A thicker liquid responsible for vapour production
- Nicotine: Available as concentrated shots or in diluted form
- Flavour Concentrates: Concentrated flavourings that give your e-liquid its taste
The magic happens when you combine these ingredients in specific ratios. A typical mix might contain:
- 70% VG for thick clouds
- 30% PG for flavour delivery
- 3mg/ml nicotine strength
- 10-15% flavour concentrates
The Mixing Process
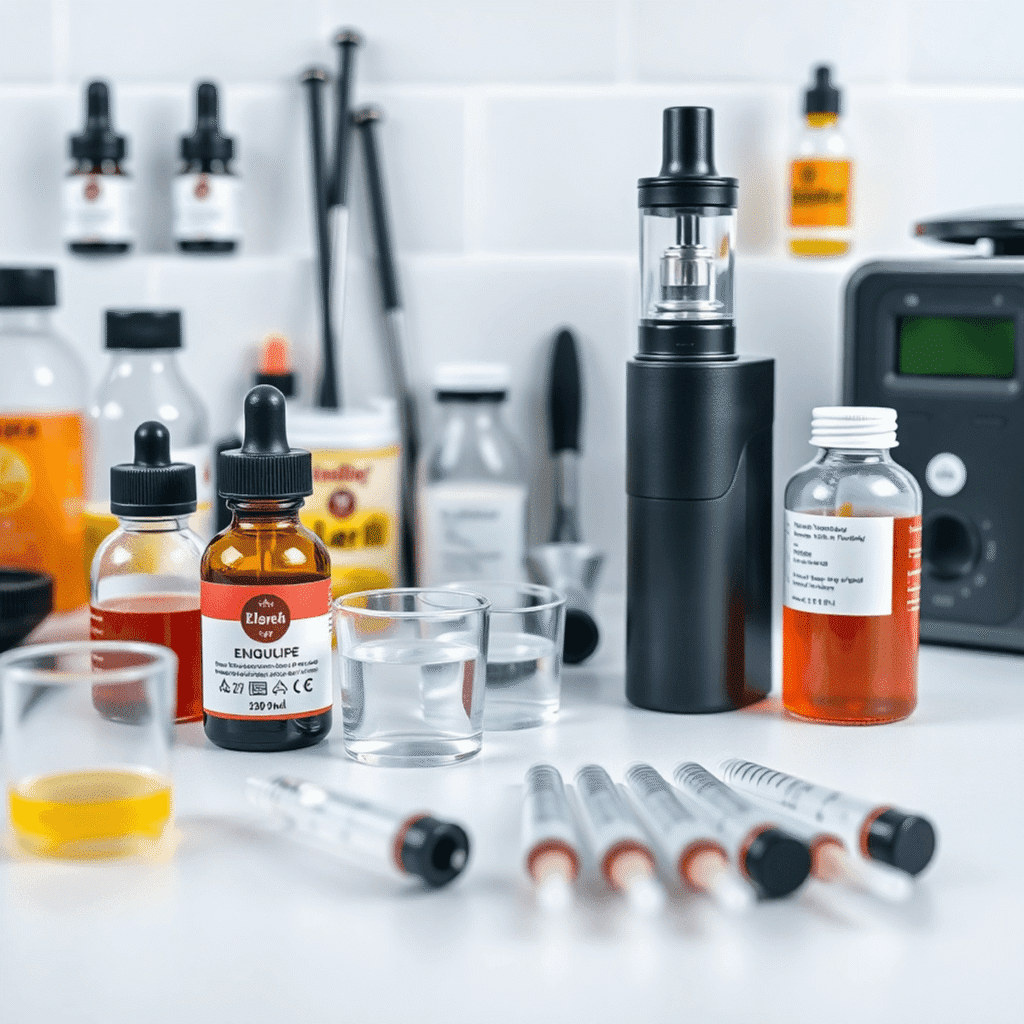
The mixing process involves measuring each component precisely using:
- Digital scales (0.01g accuracy)
- Graduated cylinders
- Pipettes or syringes
- Mixing bottles
After combining your ingredients, the mixture needs to steep – a process where the flavours blend and mature. Steeping times vary:
- Fruit flavours: 3-5 days
- Dessert flavours: 1-2 weeks
- Tobacco flavours: 2-4 weeks
You’ll need to store your creations in dark glass or plastic bottles away from direct sunlight and heat. The steeping process can be accelerated by gentle heat or agitation, but patience often yields the best results.
Keeping Records
For consistent results, keeping detailed records of your recipes helps you replicate successful mixes and adjust less successful ones. Many mixers use dedicated apps or spreadsheets to track their formulations.
Considering Your Device
It’s also worth considering the type of device you’ll be using with your DIY e-liquids. For instance, the Vaporesso Eco Nano 16W Pod Vape Kit is a compact and lightweight option that offers convenience and versatility for both beginners and experienced vapers.
If you’re looking for a device that enhances flavour delivery, the Vaporesso LUXE Q Replacement Pods with MESH pod technology could be an excellent choice. These pods are designed to provide a substantial battery-powered vaping experience, delivering pure flavour with every breath.
On the other hand, if you’re interested in pre-filled options, the 20mg Lost Mary BM600 Prefilled Replacement Pods offer an expertly-crafted vaping experience with each package providing two pre-filled pods.
Lastly, if you’re considering using nicotine salts in your mixes, the Vaporesso GT Cores GT2 Coil is popular among vapers for such purposes.
Health Implications
Remember to always consider the health implications of vaping versus smoking. According to recent research, vaping is generally considered a less harmful option than smoking, primarily due to differences in their chemical compositions.
Advantages and Challenges of DIY E-Liquid Mixing
DIY e-liquid mixing offers distinct benefits alongside important considerations that demand careful attention.
Key Benefits:
- Complete Customisation Control: Create unique flavour combinations and adjust nicotine strengths to match your exact preferences. Mix fruity with dessert notes or craft single-flavour concentrates to your taste.
- Substantial Cost Savings: A 100ml bottle of premium e-liquid typically costs £20, while DIY ingredients for the same amount average £3-£5. Regular vapers can save hundreds of pounds annually through home mixing.
- Quality Assurance: Select each ingredient from trusted suppliers, avoiding artificial sweeteners or unnecessary additives found in commercial products. This control helps reduce potential allergic reactions or sensitivity issues.
Essential Considerations:
- Learning Requirements: Precise measurements are crucial – even small variations can significantly impact the final product. You’ll need to master:
- Basic mathematics for recipe calculations
- Proper mixing techniques
- Understanding flavour interactions
- Steeping time management
- Safety Protocols: Handling concentrated nicotine requires strict safety measures:
- Store in childproof containers
- Use nitrile gloves
- Mix in well-ventilated areas
- Keep first aid information accessible
- Label all bottles clearly with contents and dates
The DIY journey demands dedication to learning proper techniques and unwavering attention to safety protocols. These requirements, while challenging, enable you to craft personalised e-liquids that match your preferences perfectly.
For those who prefer a more convenient option, Vaporesso XROS 4 Vape Pod Kit offers a user-friendly device with adjustable vapour production and a quick charging feature. Alternatively, the Vaporesso XROS 3 Mini Pod Kit is another excellent choice for those looking to cross the limits of vaping convenience.
If you’re considering trying out different e-liquids without the hassle of DIY mixing, exploring reviews on various products could be beneficial. You can find valuable insights by visiting Top Vapes Reviews.
For those who already own a Vaporesso XROS device and are looking for replacement pods, the Vaporesso XROS Series Corex 2.0 Replacement Pods are high-tech options that can transform your vaping experience.
Getting Started with DIY Mixing: Essential Equipment and Tips from Team Top Vapes
The Team Top Vapes experts recommend these essential tools for your DIY e-liquid mixing journey:
Basic Equipment List:
- Precision syringes (1ml, 5ml, 10ml sizes)
- Pipettes for small measurements
- Safety gloves (nitrile recommended)
- Storage bottles (both amber and clear)
- Funnels of various sizes
- Labels and markers
- Clean workspace materials
Your mixing accuracy directly impacts your vaping experience. We recommend using dedicated measuring tools rather than kitchen equipment to ensure precise measurements down to 0.1ml.
E-liquid calculators prove invaluable for precise mixing. These digital tools help you:
- Calculate exact measurements for each ingredient
- Determine proper nicotine strength
- Balance PG/VG ratios
- Track your recipes
Beginner-Friendly Recipe Tips:
- Start with single-flavour recipes
- Use pre-mixed base solutions
- Keep detailed notes of your measurements
- Allow proper steeping time
The Team Top Vapes testing lab suggests beginning with simple fruit flavours, as they require minimal steeping time and offer straightforward mixing ratios. You’ll find these easier to perfect before advancing to complex dessert or tobacco blends.
Remember to store your equipment in a clean, dry area away from direct sunlight and heat. A dedicated storage box helps maintain organisation and prevents cross-contamination between different flavourings.
Understanding the TPD Regulations for DIY E-Liquid Mixing in Europe
The Tobacco Products Directive (TPD) shapes the DIY e-liquid mixing landscape across Europe with specific requirements designed to protect consumer safety. These regulations directly impact how you can purchase and mix your e-liquids.
Key TPD Restrictions
Here are some of the key restrictions imposed by the TPD:
- Maximum nicotine strength of 20mg/ml (2%) for e-liquids
- Nicotine-containing bottles limited to 10ml capacity
- Mandatory child-resistant packaging
- Clear ingredient labelling requirements
- Registration of all e-liquid components with relevant authorities
Practical Considerations for DIY Mixers
The TPD regulations create certain practical considerations for DIY mixers:
- You’ll need to purchase multiple 10ml bottles of nicotine base, such as the 20mg LOST MARY BM6000 Refillable Pod Kit, which offers a maximum nicotine strength of 20mg.
- Base liquids without nicotine can be bought in larger quantities, like the Mexican Cartel Menthe Polaire E-Liquide available in 50ml or 100ml.
- All ingredients must display batch numbers and expiry dates
- Safety data sheets must accompany nicotine-containing products
These safety measures protect consumers through standardised packaging, clear warnings, and controlled nicotine concentrations. The regulations also ensure consistent quality through mandatory testing and verification of ingredients.
Adapting Mixing Strategies
For UK DIY mixers, this means adapting mixing strategies to work within these parameters. Many enthusiasts opt to buy nicotine shots separately and combine them with larger bottles of nicotine-free base liquid, a practice known as “shake and vape.”
The Team Top Vapes testing lab strictly adheres to these regulations, ensuring all our product recommendations align with current European safety standards.
DIY e-liquid mixing suits specific types of vapers. Our Team Top Vapes experts have created this assessment guide to help you determine if DIY mixing aligns with your vaping journey.
Ideal candidates for DIY mixing include:
- Flavour enthusiasts – You love experimenting with unique taste combinations and creating personalised blends
- Cost-conscious vapers – You seek significant savings on e-liquid expenses through bulk ingredient purchases
- Control seekers – You want complete oversight of what goes into your e-liquid
- Patient learners – You enjoy mastering new skills through research and practice
If you find yourself resonating with these traits, you might also be interested in exploring more about sub-ohm vaping, which is a popular trend among DIY mixers due to its potential for creating rich flavors and impressive clouds.
However, before diving into DIY, consider these practical requirements:
- Time investment: 1-2 hours weekly for mixing sessions
- Storage space: Dedicated area for equipment and ingredients
- Initial setup costs: £50-£100 for basic equipment
- Safety measures: Proper protective gear and secure storage solutions
It’s crucial to note that safety should always be a priority when handling raw nicotine. If you’re unsure about managing this aspect, it might be worth considering other options such as using pre-mixed e-liquids or exploring the Vaporesso Xros 5 Pod Vape Kit which offers a user-friendly experience with rich flavor and smooth performance.
Red flags that suggest DIY might not suit you:
- Limited time for precise measurements and documentation
- Reluctance to handle raw nicotine safely
- Preference for immediate gratification
- Limited space for storing supplies and equipment
The Team Top Vapes assessment tool helps evaluate your DIY readiness. Rate yourself on these key aspects:
- Attention to detail
- Safety consciousness
- Time availability
- Storage capabilities
- Budget flexibility
A high score across these categories indicates strong DIY potential.
However, if you score low in several areas, it may be wise to reconsider your approach. For instance, if you’re seeking a more convenient vaping solution, the Vaporesso XROS 5 Mini Pod Kit could be an excellent alternative. This compact device is designed for vapers seeking a reliable all-day experience with minimal hassle.
Remember, the ultimate goal of switching to vaping is often to quit smoking altogether. If that’s your aim, our comprehensive guide on how to quit smoking could provide valuable information and strategies to help transform your smoking habits and lead you towards a healthier tomorrow.
Lastly, if you’re considering a transition into advanced vaping techniques, understanding what a vape mod is could be beneficial. This knowledge could open up new avenues in your vaping journey, providing insights into advanced e-cigarette features and benefits that many UK vapers are currently exploring.
Conclusion
Your DIY vaping journey starts with understanding your personal needs and commitment level. At Team Top Vapes, we believe that the path to successful DIY e-liquid mixing lies in making educated choices aligned with your lifestyle.
We’ve seen countless vapers transform their experience through DIY mixing – creating unique flavours, saving money, and gaining a deeper appreciation for the craft. The satisfaction of crafting your perfect e-liquid blend is unmatched.
However, it’s important to remember that vaping can have different effects on different aspects of your life. For instance, if you’re considering fasting, you might want to explore does vaping break a fast? This could provide valuable insights into how your vaping habits might impact such practices.
Ready to dive deeper into the world of DIY vaping? Visit TopVapes for:
- Detailed product reviews
- Step-by-step mixing guides
- Expert tips and tricks
- Active community discussions
- Safety guidelines and best practices
Your vaping experience is personal, and we’re here to support your journey. Connect with our community at TopVapes.co.uk, where you’ll find comprehensive resources, expert advice, and fellow enthusiasts ready to share their knowledge.
If you’re also looking for support in your journey towards quitting smoking, we have dedicated resources available in our quitting smoking section.
Remember: The perfect vape is the one that works for you.
undefined FAQs (Frequently Asked Questions)
What is DIY e-liquid mixing and why is it gaining popularity among vapers?
DIY e-liquid mixing involves creating your own vape juice by combining base liquids like PG and VG, nicotine shots, and flavor concentrates. It’s gaining popularity because it allows vapers to customize flavors and nicotine strengths exactly to their preferences, often at a lower cost than commercial e-liquids.
What are the essential components and equipment needed for DIY vape juice mixing?
The essential components include propylene glycol (PG), vegetable glycerin (VG), nicotine shots, and flavor concentrates. Key equipment includes precise measuring tools such as syringes or pipettes, an e-liquid calculator to determine ratios and nicotine levels, gloves for safety, bottles for storage, and funnels to aid in mixing.
What are the main advantages and challenges of DIY e-liquid mixing?
Advantages include full customization of flavors and nicotine strength, cost savings compared to buying commercial products, and control over ingredient quality without unwanted additives. Challenges involve a learning curve in mastering accurate measuring and mixing techniques, as well as important safety precautions when handling nicotine.
How do European regulations like the Tobacco Products Directive (TPD) affect DIY e-liquid mixing?
The TPD sets rules on ingredient labeling, bottle sizes, and maximum nicotine strengths available in Europe. These regulations enhance consumer safety but also limit certain aspects of DIY mixing, such as restricting maximum nicotine concentration and the availability of some ingredients.
Who is best suited for DIY e-liquid mixing according to Team Top Vapes?
DIY mixing is ideal for vapers who enjoy customization, experimentation, and cost-effectiveness. It suits those willing to invest time and patience to learn proper techniques safely. Beginners should assess their interest level before starting to ensure a positive experience.
How can beginners safely get started with DIY e-liquid mixing?
Beginners should start with simple recipes while using essential tools like measuring syringes, an e-liquid calculator, gloves for handling nicotine safely, and proper storage bottles. Understanding the steeping process and following safety precautions such as wearing protective gear are critical steps recommended by Team Top Vapes.